I’ve been very excited to visit our favorite vintage and antique shops here in our area (Willis, New Waverly, Conroe, TX). Our first stop was at Yesterday’s Treasures in Willis. I follow them on Facebook and have been seeing some of their posts showing new Fall home decor items, so, come on Willie, let’s go!
Our friend Kelly with Sweet Magnolia Emporium has several booths here, and we did actually run into her during our visit, so that was definitely a fun surprise. Ms. Shirley and Stan were there as well, so it was great to get caught up with everyone.
Upon entering the store, we were immediately greeted with cozy Fall ambiance.
It smelled really good in here too, definitely adding to the feels.
I took a few snapshots of some of my favorite new finds, including some of the goodies I brought back with me to Royalview.
These beautiful blingy pumpkins are what caught my eye right away.
I brought home the rhinestone covered pumpkin in the back, and the white and gold pumpkin in the front. These are from Kelly’s booth.
Kelly also just upcycled some old fans, and turned them in to gorgeous home decor items. She texted me about these about a week ago, and I thought her idea was so brilliant. Here’s one that is currently in her booth at Yesterday’s Treasures:
Here are some peeks at what you can find this Fall at Yesterday’s Treasures:
Now, these beauties also came home with me. There is another set still there that is similar. So beautiful!
I hope you get a chance to visit the fine folks at Yesterday’s Treasures in Willis, TX sometime soon, and enjoy shopping all the unique vintage and antique offerings from many wonderful vendors.
Till next time, enjoy getting ready for Fall! God is truly good!
Johanna and Willie
acrossthelake.blog
Vintage and Antique Shopping, Willis, Texas, Fall Home Decor, Unique Finds, Glass Pumpkins, Rhinestone Pumpkins, Blingy Pumpkins
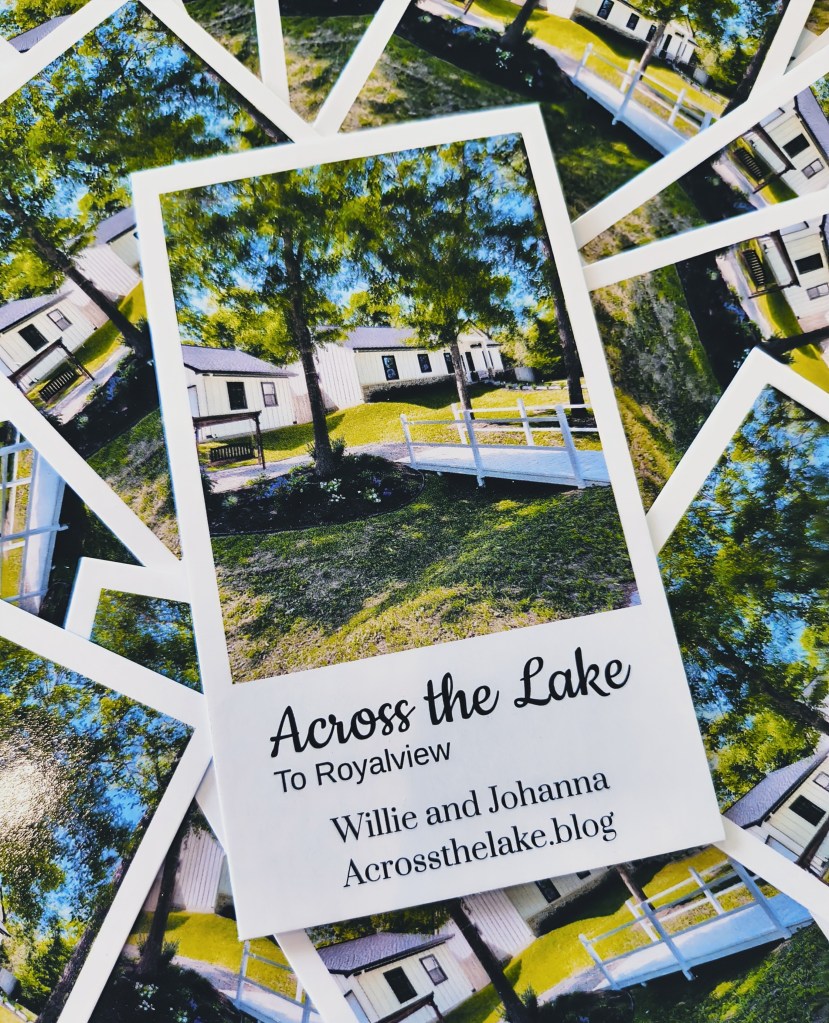
We’re so excited, and so happy how our new business cards turned out. We’ve been waiting to have cards made till Royalview was at her best. She’s come a long way, as I’m sure you know if you’ve been following us from the beginning of our journey here.
We have found that we are really going to appreciate having these cards as we meet new people/vendors here in our area, and chat with them about our story. It will be so much easier to hand them a card rather than reciting the blog address.
We’re all official now, well, at least Royalview is! Thank you VistaPrint. Not a sponsor, but satisfied customers for years.
Well gang… The time is here. No more avoiding the boxes in the back rooms…
We’ve been having so much fun getting the front part of our home all set up, that we put the 2 back bedrooms on the bottom of our to-do list. But not any longer.
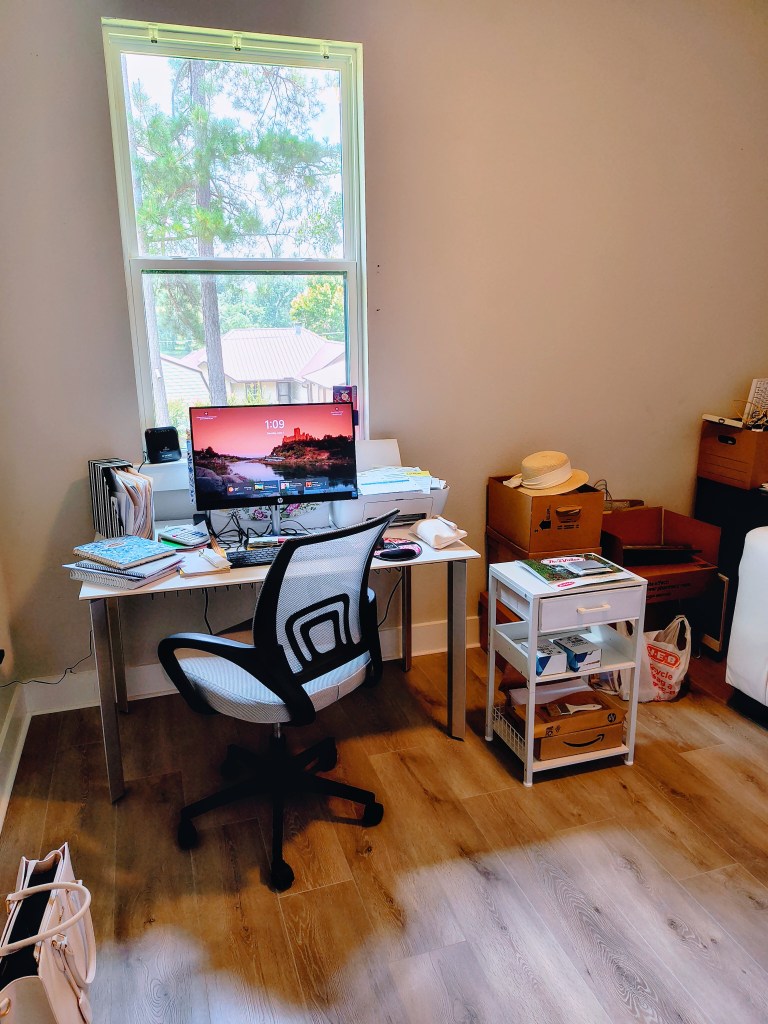
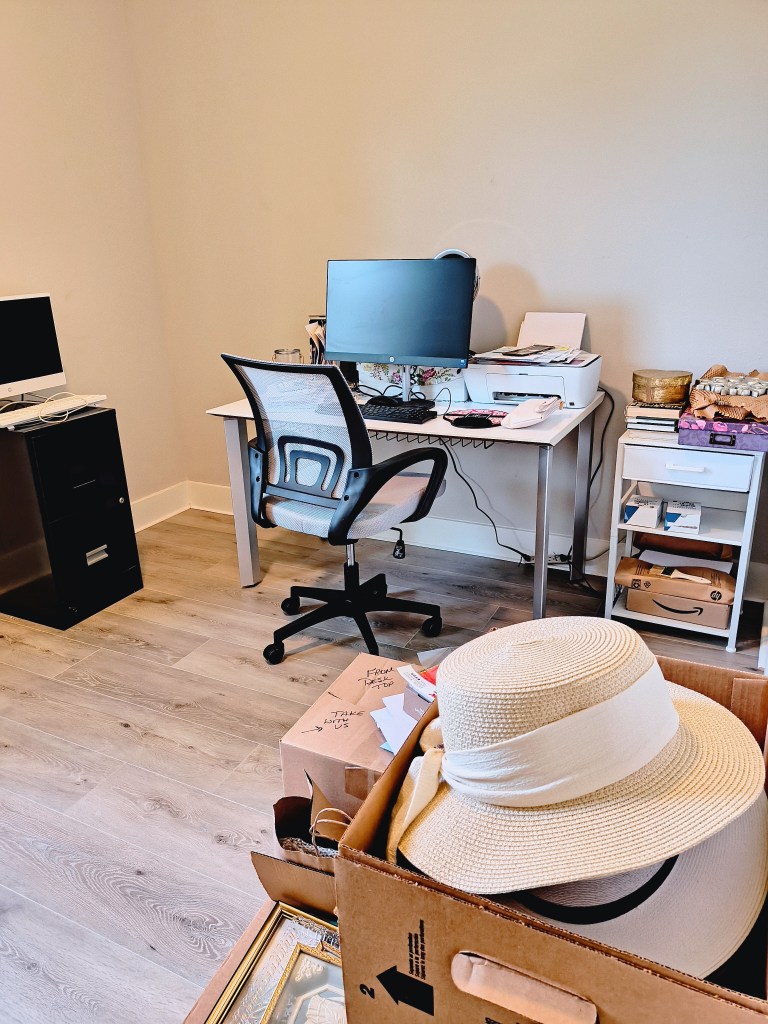
One of the back rooms has been serving as an office, and it will continue to be an office.
Isn’t she lovely? Well, she will be, hopefully! This has been my point of operations for blogging, bill paying, etc., and I’m really looking forward to getting everything all set up and beautified.
Willie is in the beginning stages of putting my new desk together.
Can’t wait to show you the reveal. It’s a really cute farmhouse desk design.
While Willie was working in the garage getting the desk pieces sorted, I went to work on all those boxes in the second back room. I had to make some tough decisions. I had already gone through everything before moving from Wintergreen (our former home), but since we’ve been living here almost 6 months now (move in date was December 18, 2024), and I’ve not used items that are in the boxes waiting to be unpacked, I figure I must be able to live without them. The exception being, seasonal and holiday decor, and must-keep pictures and keepsake items. So here we go. If an item does not fit in the keepsake or holiday category, and I’ve not needed it, nor do I feel like I will need it in the near future, it either gets donated, or thrown out.
Looks like I am able to live without a lot of the stuff we brought.
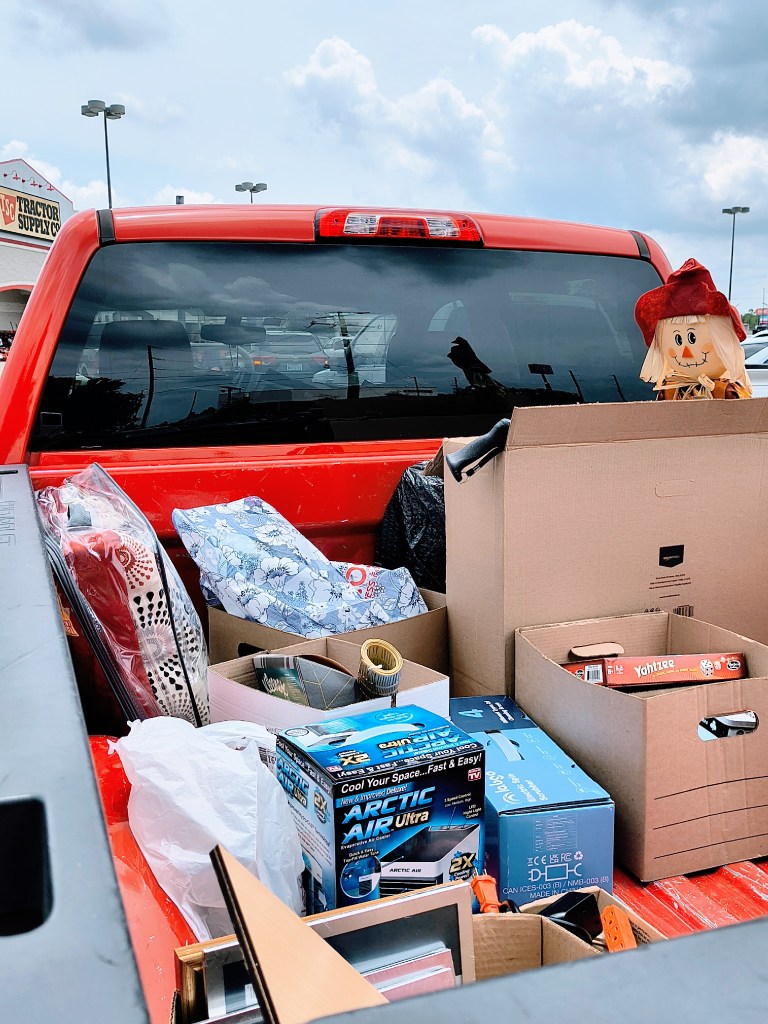
We headed for town and donated to our favorite college student, our local vintage store, and Goodwill.
This Goodwill Donation Center is located in Willis, Texas. It’s very nice, and really easy to pull right up to the door. The gentleman working here opened the door and helped us unload.
Now we are clutter free! (Almost!) But we’ve gone through pretty much of our belongings, and we are learning that less is definitely more, especially if you’re just storing it, thinking you may use it down the road. We’re learning to just let it go. It’s very freeing.
We headed back to Royalview, and got busy moving furniture and the remaining boxes, whose contents will be used in some capacity.
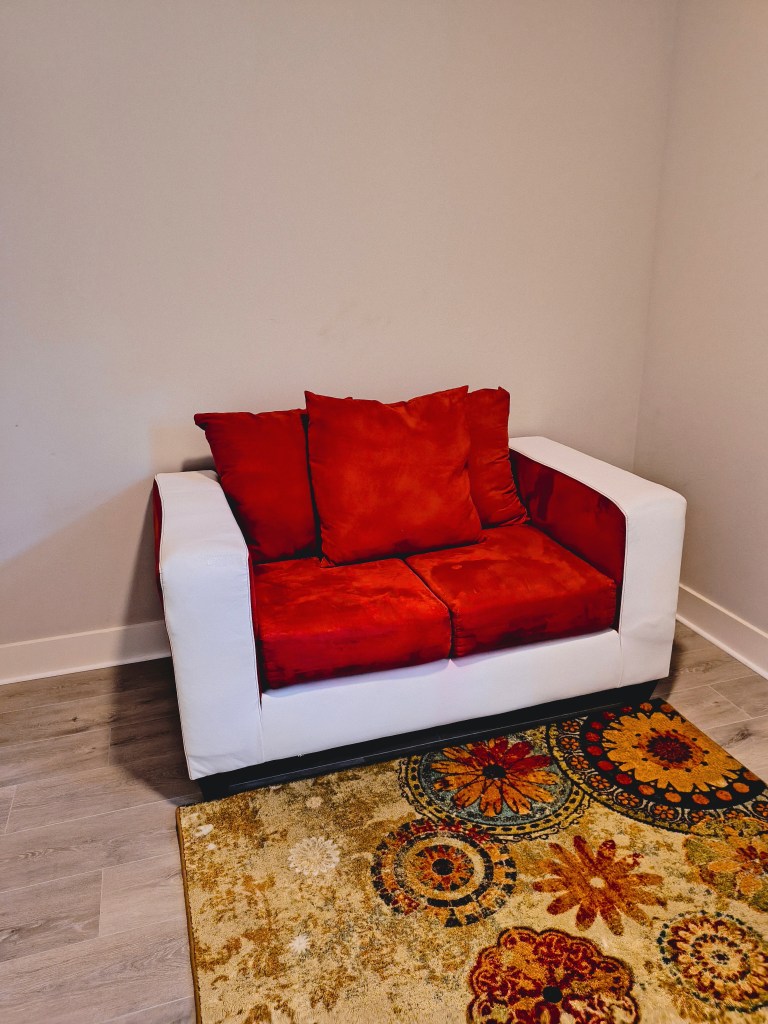
We moved this love seat from the office to the second room that was once filled with boxes. We brought this love seat and area rug with us from Wintergreen. It doesn’t go with the rest of our decor here at Royalview, but we’re going to keep it for now, till we decided exactly how we want to use this room. But for now, we’re going to use it as a resting area for Willie when he comes in for a break after working outside or in the garage. We kept the TV that we used in the living room before our new TV purchase, so we’ll get that set up for him in here and get it decorated a bit more. But it already looks better, and he can take a break in here now. There is a window in here that overlooks the back yard as well, so it is pleasant.
For the office, we moved my current desk (table) over to the wall where we once had the love seat.
This makes room for my new desk to be in front of the window.
This is my gorgeous view.
God is so good! What a joy to be able to work indoors and still get to see this beautiful view. I’m still pinching myself everyday, and giving God praise everyday for guiding us to Royalview.
I’ll keep you updated on our progress. Willie’s installing blinds in the two back rooms today, as I’m blogging. He is so awesome, and doing a great job.
Till next time, be kind, and always follow your joy! God is truly good!
Johanna and Willie
acrossthelake.blog
Moving Into Our New Home, Unpacking, Unboxing, Decorating, Moving Furniture, Putting Furniture Together, Hanging Blinds, Setting up Office, Lake House with a View, Conroe, Willis, Texas
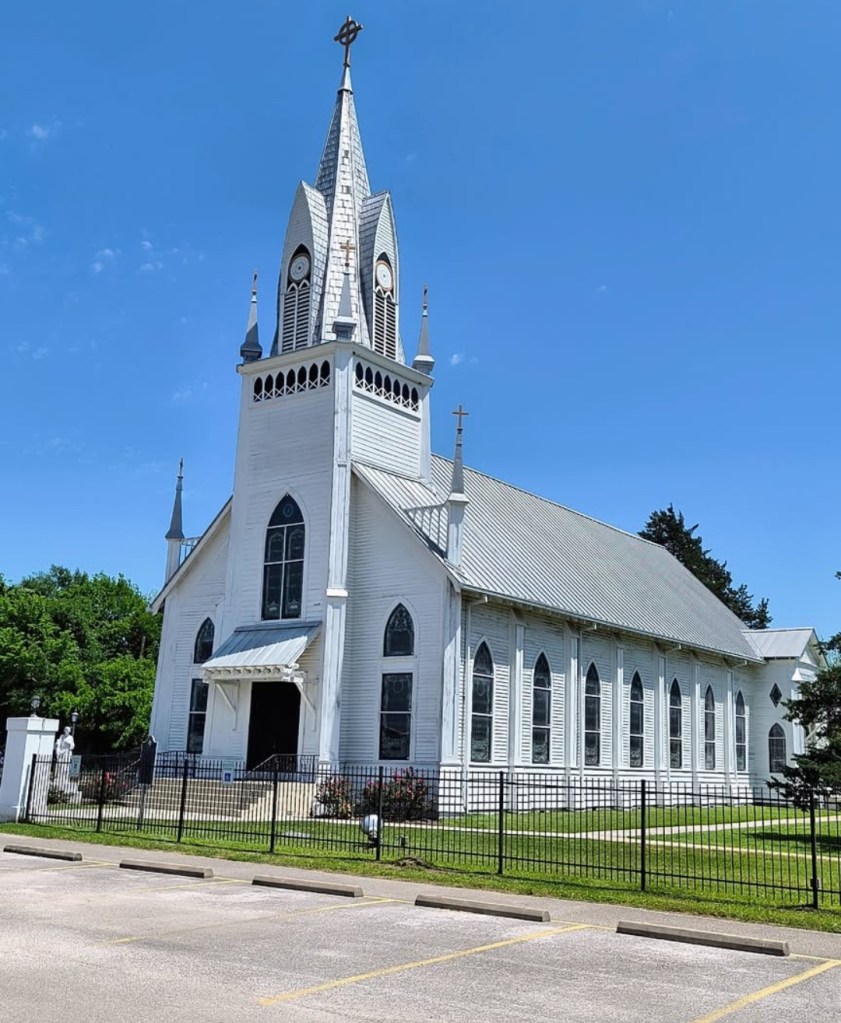
I actually saw it just a little while back while visiting Yesterday’s Treasures in Willis, TX. I first saw a historical church that this little birdhouse resembles, in New Waverly, TX. It is so beautiful. It’s named St. Joseph’s Catholic Church.
Soon after that I saw another historic church like this in Willis, Texas. I really love the style of architecture, so when I spied this little church birdhouse, I was immediately intrigued.
I came across a similar church birdhouse elsewhere, but the price was quite a bit, and when I saw the one I eventually purchased, the price was very good, but I wasn’t sure where I could use it in my decor.
Well, I woke up Saturday morning with the little church birdhouse on my mind, and we were headed out on a shopping adventure with Aunt Bunny that day anyway, so I decided to see if it was even still available, and, thankfully, it was.
When we went to pick it up, I didn’t realize the actual condition that the house was in, as I hadn’t fully examined it the first time. I decided to go ahead and purchase it as the price was good, and I knew I would have fun fixing it up.
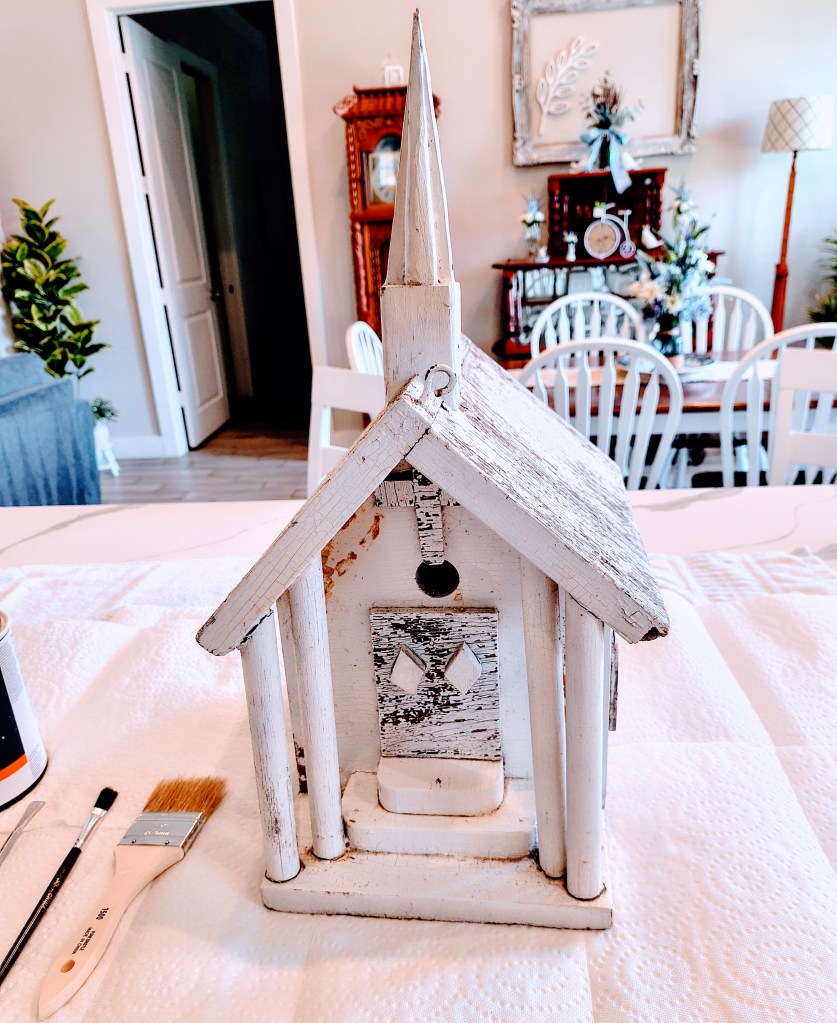
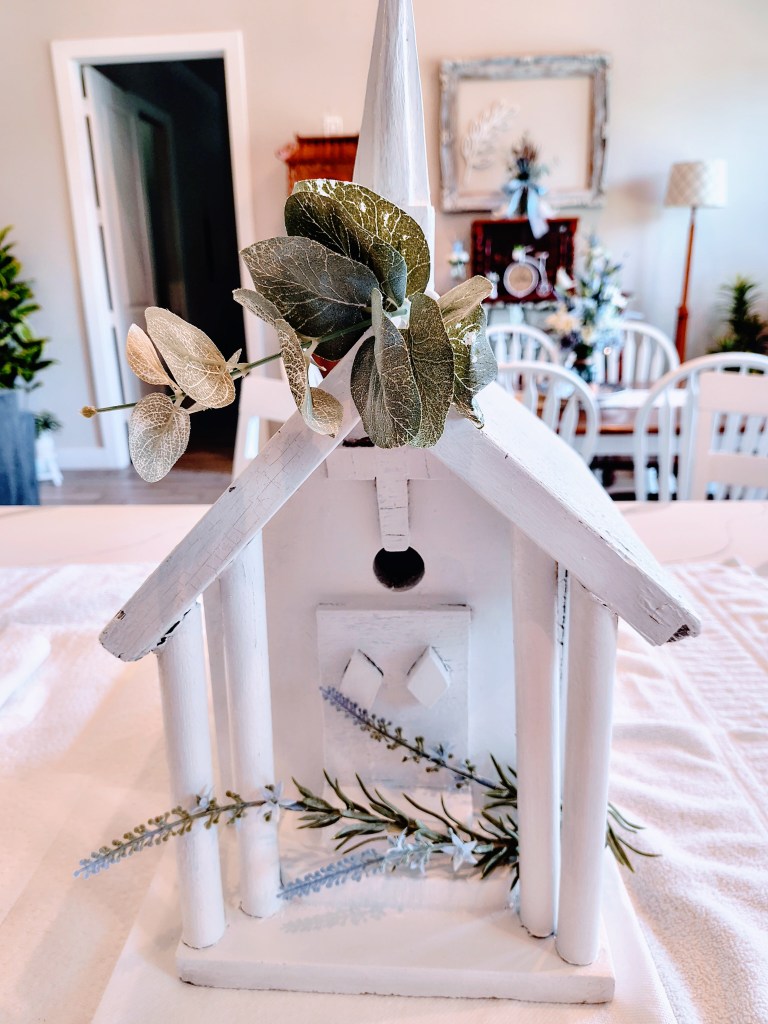
This picture is after Willie cleaned it up a bit outside and removed the dirt dobber nest that was on the front facade. This birdhouse was evidently used outdoors as an actual birdhouse, and not for home decor, so it is the real deal. But this real deal needed a little TLC to get it to where we would want to display it indoors at Royalview. I do like the rustic, whitewashed look, but this was a little intense, even for me.
So, after giving it a good wiping down with damp paper towels, I got my water based white paint out once again to see if I could improve on the looks.
The paint went on easily, and while it still has a worn look, it is much fresher now.
I added a little faux floral to give it even more charm.
I’m very happy with the outcome. It’s amazing what a little bit of paint can do.
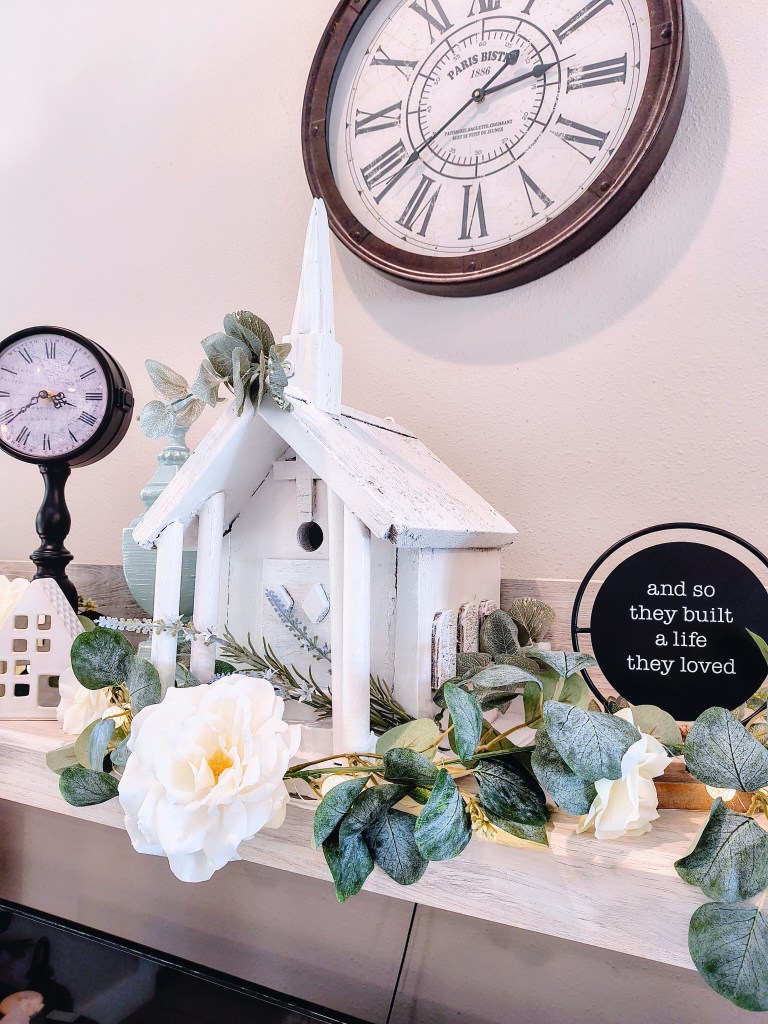
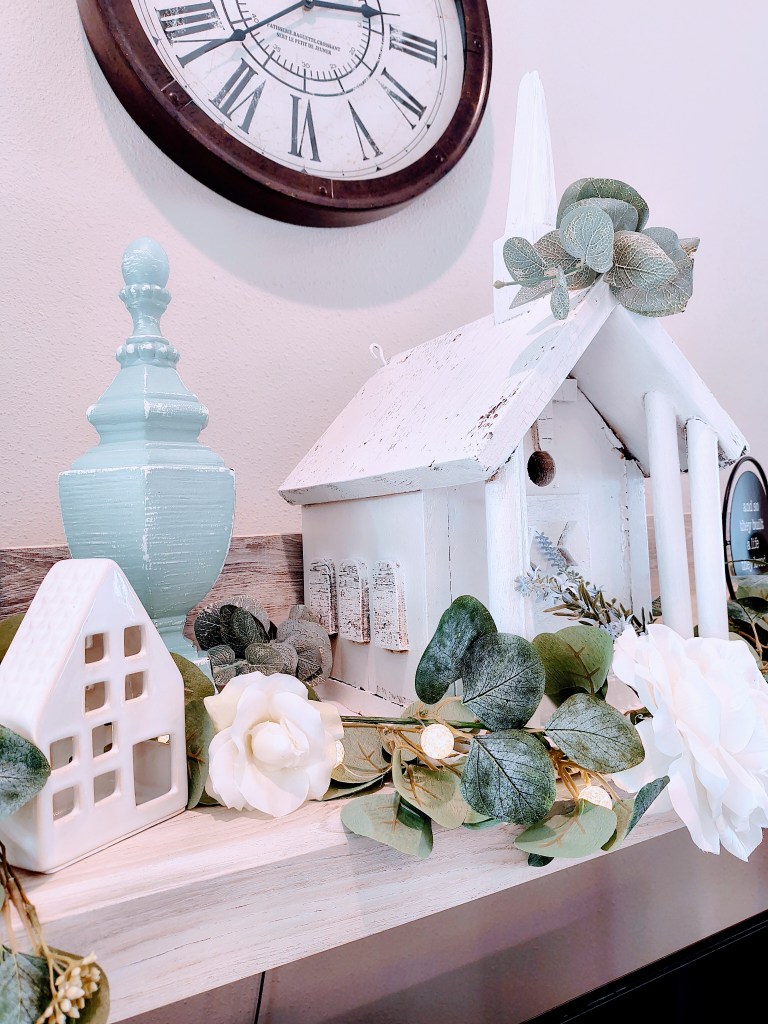
After completing the little birdhouse’s transformation, I thought it would be perfect as the focal point of our entertainment center’s vignette. So, yet another swap-out of decor! But that’s the fun of it!
So cute! And adds so much charm. I’m really loving it. It still has a rustic look, but not quite as shabby as before. Now I suppose it is shabby chic!
I hope you’ll stay tuned for our next blog post. We enjoyed another fun dining and shopping adventure with Aunt Bunny.
Till next time, and I usually say stay safe, and I always will hope so for you, but this time I am going to sign off with a message that a little kindness can go a lot further than you can even imagine. God is truly good.
Johanna and Willie,
acrossthelake.blog
Vintage Church Birdhouse, Bird House, White Church, Shabby Chic Home Decor, DIY Decor Transformation
Can you smell the lavender in the air here at Royalview today? It’s so lovely.
And while it smells, and also looks very lovely, it is going to serve a good purpose in our home living environment.
I encountered a little scorpion hiding in a hand towel the other day. That gave Willie and I both a bit of a scare, and we also inherited spiders that live here on the property, so I began looking into natural ways to sway them away from wanting to live with us in our home. Lavender came up on both counts (for scorpions and spiders) when I did a Google search, and a knowledgeable plant specialist also told me that lavender, as well as fresh mint, and thyme, all work.
I ordered pre-made lavender sachets just a little while back, but they did not seem to be very fragrant, so I decided to search for dried lavender that may be better sealed, and attempt to make my own sachets. I searched lavender farms here in Texas, and also searched my favorite go-to, Amazon. I succeeded in finding a vacuum sealed bag of dried lavender on Amazon, as well as some really nice bundles of dried lavender flowers.
I also found some really cute burlap sachet bags with heart shapes on them which I thought were really pretty, and would be great for putting in dresser drawers, cabinets, and for display as well.
I was very excited when everything arrived. My Aunt Bunny gifted me a beautiful clear glass vase, which is perfect for my dried lavender bouquet.
First things first, opening the vacuum sealed bag of lavender. How would I contain all that, once it’s opened? Luckily, I remembered bringing a metal tub with us when we moved. That will be the perfect size to pour all the lavender into.
Once the bag was opened and the lavender poured into the metal tub, it was time to start spooning it into the little sachet bags. And the aroma… So beautiful! So fragrant! I love it!
In the description of this vacuum sealed bag of dried lavender flowers, the seller suggests gently crushing the dried flowers to release even more fragrance, so as I spooned the lavender into the bags, I would then just gently smash the flowers in the bag. I could smell the fragrance even more after doing this. I spooned approximately 3-4 teaspoons into each bag.
Aren’t these little burlap bags just the cutest? I love that the set came in 2 different tones. 10 in white, and 10 in beige, and they have the little light brown burlap hearts on each. So perfect for farmhouse decor.
Next up, a dried lavender flower bouquet.
This was so simple to do. At first I thought that I would be using both dried lavender flower bundles, but it turned out that 1 bundle was plenty.
I put in a few faux florals with the dried lavender, and added blue satin ribbon (that I had purchased from Amazon previously for another project).
It’s so simple, yet elegant.
I was wondering where I may want to put my new lavender arrangement, and Willie suggested atop the curio cabinet in our dining room. I already had a floral arrangement there, but you know, he may be right. I think it looks really pretty, and the florals fit into the picture frame above the cabinet very well.
Now I can place these cute little sachets all around, filling Royalview with their beautiful fragrance, and hopefully encouraging our little visitors to depart peacefully.
I think I’ll do another batch as well so I can put them in all the closets and cabinets in every room. So fun and easy to do.
Well, I hope you enjoyed visiting with me as I made my dried lavender crafts, and hope this inspires you to do your favorite crafts as well.
Till next time, stay safe, and follow your joy. God is truly good!
Johanna and Willie
acrossthelake.blog
Amazon Home, Amazon Affiliates, Homemade Dried Lavender Flower Sachets, Burlap Lavender Sachets, Dried Lavender Bouquet Arrangement in Vase, Lavender for Spiders and Scorpions
I was very privileged to meet a very special lady this week. Cinthia Alegria, of Lopez Alegria Enterprise, LLC.
Cynthia was referred to us by our Realtor, Kristin, before we moved here to Royalview. At the time, we were unable to connect our schedules, but I recently decided to reach out to her again to inquire about her services.
We have had housecleaning/maid service since we moved to Royalview. I have not been 100 percent happy with the services that Royalview has been receiving, and we have switched companies several times as a result.
But to the awesome part, and sometimes we all must go through some not so awesome parts first, but I’m so glad that I reached out to Cinthia. She has such a lovely and bubbly personality, and she really cares about what she does, and if things are cleaned to her liking, and/or satisfaction. So refreshing!
One thing that no one else has done, except Cinthia, is come by and visit our home and discuss our needs before our first housecleaning. She gave us a quote upon her visit. I was very impressed with just this gesture alone. I felt more at ease immediately from this experience, as well as knowing that she is the owner/CEO of her own company, and that she would be present on cleaning day.
Cinthia began in our kitchen (which is always my preference), and her companion, Maria, began in our bedroom.
Cinthia started in cleaning the tops of our cabinets. This is a service I have requested from other companies, since before we moved in.
Cinthia asked me if we have had a deep cleaning before, to which I replied, yes, a couple. She then took a picture of the top of the cabinets and texted it to me.
I could not believe what I saw. I shall not say anything offensive about anyone or any company here, but rather be very thankful for Cinthia.
I will say that after hiring companies, and yes, plural, companies to deep clean our new home before moving in, and also paying for deep cleaning after we moved in, and then also bi-weekly cleaning (including requesting cabinet tops be cleaned), this is how Cinthia found them.
Disappointing to say the least, but we are trying to focus on the good here, right? Right!
So, drum roll please…. Ta-da!
Sweet! So much better, and I feel much better knowing that they are now, finally, clean…
Cinthia also cleaned out our oven very well, taking the racks out and cleaning those too. She really went the extra mile. I enjoyed chatting with her and getting to know her better during her visit. She told me that she tells her employees that they need to love what they do, and to do their very best.
This is Maria, one of her employees. She is also a very nice lady, and greeted me with her beautiful smile.
These two ladies did a fantastic job. I feel so much better now about cleaning day here at Royalview. I will not have anxiety over who is coming over, or how will they do. I now feel very secure in who will be coming over, and I can relax and know that Royalview is in very good, kind-hearted, caring hands.
Lopez Alegria Enterprise is located in Spring, Texas. I very, very, highly recommend Maria and her team.
You can find Cinthia on Facebook, Lopez Alegria Enterprise on Facebook (Cinthia’s husband specializes in home improvement), and Lopez Alegria Enterprise LLC on Instagram.
This is not a sponsored post. We love to spread good news about companies that have helped us in our journey and deserve a shout-out, as well as help others like us looking for wonderful people to work with.
Till next time, stay safe, and follow your joy! God is truly good!
Johanna and Willie
acrossthelake.blog
Best House Cleaning Company Review, Maid Service, Spring, Texas, Housecleaning of your Dreams, Best Recommended House Cleaning Service, Conroe, Willis, Woodlands, Texas, Woman Owned Business, Support Small Business
This is a project I had both been looking forward to, as well as being a bit shy to begin. Let me introduce you to Beauty, as we affectionately call her. Beauty has been with us for 20 years now. She was hand-turned on a lathe by Willie, and hand painted by me when we were working together as Studio 3B, creating wooden candlestick holders and candles.
Now that we’ve moved to Royalview and changed our decor, her burgundy and gold colors no longer fit in aesthetically, but I knew I’d never let her go, so she was slated for a complete transformation.
To begin, I used a soft grit sandpaper to remove the varnish. I chose not to completely sand her down (back to original wood), but rather use the deep burgundy as an undertone so she would have an aged look after completion. In other words, I was not planning a “pristine” white look.
This was the scary part. Putting on the first coat of white, and covering up her original burgundy. I used a water based paint (same as my previous project).
Here’s her first coat of white. The burgundy still shows through, but she’ll get a second coat.
Now that she’d had her second coat of white paint, I knew that I wanted contrast in all her gorgeous nooks and crannies. I opted for gray. I considered silver or blue, but I wanted Beauty to have an elegant, yet understated, look this time.
Beauty’s new look.
It really just took patience and tweeking to achieve the look I wanted with the right balance of rustic, but yet still keeping her elegant.
And here she is now in her corner spot. I put a little plant on top. She’s a candleholder, but that looks really pretty! We’ll see what I end up getting for her topper, but for now, I’m liking it!
These are the fun little projects that really make it feel like home here at Royalview. Our own personal touches, and items that we brought with us, that can still be incorporated into our new environment.
Till next time, stay safe, and follow your joy!
Johanna and Willie
acrossthelake.blog
DIY Home Decor Paint Project, Tall Wooden Candlestick Holder, Makeover, Before and After Transformation
Boy, did we have a great time yesterday! The weather was BEAUTIFUL! I cannot recall another May when we’ve experienced temperatures in the 70’s after a cool front moving through, here in Texas. It was the perfect day to travel up to New Waverly and walk around that charming little town, visiting all the spots that were taking part in their special Mother’s Day Event.
We began our day with breakfast at Honey’s Coffee and Biscuits.
We’ve actually been wanting to try Honey’s ever since we saw their menu being printed at our local UPS Store. I knew I wanted to try their Spinach, Egg, and Feta Biscuit Panini, for sure. I ordered it in one of their Brunch Boxes. They are so cute, and it comes with House Potatoes and fresh fruit. Great way to start our adventure!
After our brunch, we walked across the street to New Waverly Antiques and Collectibles. We have been here before, and really enjoy visiting.
There is so much history to browse through here.
Check out their milk glass collection in white. We have a few pieces at Royalview from their stash.
And look what I found for our antique cabinet in the dining room. I was thrilled to find this miniature wooden table and chairs dining room set. I thought it would be fun to paint these white and have a little vase of flowers on top. Christine and Mary both helped me look for a vase, and Mary was the winner with this little cutie, and she even put some little flowers in it. Such a fun time here for sure.
Our next stop was next door at the New Waverly Feed Store. They had a Farmer’s Market going on with vender’s tents all set up in the parking lot.
We looked around here for a bit and then took a stroll across the Railroad Tracks to another favorite spot, Rosey Opals.
Rosey Opals was hosting a Mother’s Day Market and had vendors outside, as well as special sales going on inside, plus the Red Bird Ice Cream Parlor was open. That’s such a fun feature in this antique mall.
The very first booth upon entering is one of my favorites. The aesthetic is definitely my vibe. How gorgeous is this Mora Clock?
Do you spy the little white bird just to the left of the clock? I’ve been eyeballing this beautiful wooden hand carved bird on several of our visits. He was 50% off during their event, so he came home with us.
The real highlight of our entire day came when we decided to venture outside to the vendor’s tents. I spied some cute little birdhouses, so I went directly there and we met two of the most wonderful ladies ever. Mary from The Rusted Crow, and Gloria, from Good Vibrations Furniture.
This is Mary’s Booth (The Rusted Crow). She has a lot of wonderful home and garden pieces that she makes with love and whimsy. She and I talked for quite a while, as did Willie and Gloria. I feel like we became instant friends. These two ladies are what make this type of adventure so worth while. Willie and I love going out and about in our new hometown and nearby surroundings, meeting people, supporting all the local artists and vendors that we can, and hopefully beginning some very valued new friendships.
Gloria specializes in restoring vintage furniture and giving them a new groove. She’s pretty groovy herself!
Check out the paint colors on those table legs. So beautiful. And a gorgeous bumble bee decoupage table top.
After such an exciting day, we were very hungry, so we headed to another new family owned fave in Willis, Pizza Shack.
After living in this area almost 5 months now, I am beginning to feel like a local, as we’re starting to get recognized here and there. This has been a dream of mine and Willie’s for quite some time. Small town life.
The food at Pizza Shack is pretty, and yummy too.
I got the Classic Margherita Flat Bread. Mwah!
The perfect ending to a perfect day.
And here’s our little stash of goodies from our antiquing adventure.
We got the hand carved wooden bird plus that cute little “Queenie” bird, as I’m calling her, with her golden crown. The little miniature wooden dining room table and chairs set with the miniature vase (flowers included, thanks to Mary) and a couple of lace doilies.
I also spied some faux lavender bush stems at Rosey Opals that are perfect for a project I actually dreamed of while I slept the other night. I woke up with the idea to paint a basket that we brought with us from our former home (it’s in our back room with the rest of our stuff to be unpacked), and to lay some lavender in the basket as if someone had been out in a field picking it and putting it in the basket.
You can imagine when I saw these lavender bushes, I knew it was meant to be. Plus these little beauties sparked our conversations with Mary and Gloria outside. Double blessing!
I know I say it on every post. And it’s because it is really true. God is truly good!
Till next time, and new adventures, be safe and please always follow your joy!
Antique Shopping, New Waverly, Texas, Willis, TX, Antique Finds, New Hometown, Craft Vendors, Farmer’s Market, Antique Mall, Antique Shops, Making New Friends, Small Town Life
Let’s get this dining room decorating party started!
This all began with bringing home items from Willie’s family’s woodturning shop. Sadly, everything is being shut down and closed, including his parents’ former residence and the family business.
But from this big life-changing event, we hope to keep and restore items and let them carry on memories with us and our branch of the family.
Willie recruited our Son, Brennen, and his Nephew, Roger to help bring home a couple of antique items that he had requested from the family estate. First is a wooden cabinet that his Dad made when he (his Dad) was in his twenties. Second, an antique RCA Victrola.
Roger (left), Brennen (right)
I really admire the craftmanship of this cabinet. Truly a one of a kind with hand turned wooden detailed accents. I love the fact that he (Willie’s Dad, Clyde) put red Christmas lights in the cabinet for illumination. This was probably made in the early 1960’s.
Then, this beautiful Victrola.
Isn’t that something?
It still has a record on the turn-table, and there are very old records in the cabinet below.
Very thankful to have these 2 family heirlooms here at Royalview.
Willie and I recently took a drive into Houston to visit the shop, as we’re attempting to get things cleared away, and I happened upon an old picture that was hanging in his Dad’s former office, and asked if I could bring it home. Willie said I could, and the thing that caught my eye about the picture, is the very ornate frame. I thought this would be a great salvage project, and a way to give this beautiful frame a new life in our home.
This frame is so beautifully detailed. You can see why it caught my eye.
I knew immediately upon seeing the frame, that I wanted to give it a white-wash paint effect.
Willie and I visited our local Ace Hardware and picked out a lovely shade of white and a few paint brushes for this project, as well as some other projects that I worked on at the same time. I’ll show you those as well in an upcoming post.
This process is really easy, and it doesn’t have to be perfect, by any means. I just had a lady ask me how I did this, or what type of mixture I used. I only use a water based paint. I keep my paintbrush pretty “dry” and do not load too much paint at one time. With this being a water based paint, it’s very easy to remove any excess with a damp paper towel or cloth. It’s just a matter of lightly adding almost a dry coat of paint, especially to the raised areas, which, on some of the higher point details, I did go heavier on the paint so they would really stand out.
I eye-balled it basically, and decided as I went along, how much I wanted the old paint to show through and how much white I wanted. At first, I thought I would do almost a full coverage of white, but since there is so much detail on this frame, I wanted some of the brown undertone to show through to really enhance the details. Plus, with there being white and brown tones in our dining room, this will be a great piece to bring it all together.
I did not put a top coat on, so that it would have a very old, rustic look.
And even though it has an old, rustic look, I believe it also has a very elegant look.
Once it was dry, I couldn’t wait to see how it looked hanging in our dining room, over the antique cabinet. We had to be very careful. This frame is very heavy.
Willie did a great job getting everything measured and put some heavy screws in the wall to hold it up safely.
The tall lamp you see in the above photo was designed by Willie’s Dad, and made by Willie. A lot of family history and craftmanship in this one room. Which, we also brought home a white lamp that looks just like this one, and put it in a corner in our bedroom. I just need to find a new lampshade.
I love the look of an empty frame on the wall, but for this, I wanted to add a little detail. While we were shopping at Hobby Lobby one day, I saw this wooden leaf cutout and knew it would be the perfect touch, since I also wanted to place a floral arrangement (that I had just put together) on top of the wooden cabinet, and since the arrangement is in a stemmed bowl, I knew the florals would look like they were in the frame.
So what are you thinking…? I’m loving it! But wait, there’s more… Stay with me…
And the full dining room wall view with our new arrivals:
It’s really beginning to look and feel cozy to me. I love how everything is coming together to feel more like home. I am such a nester by nature.
With the look of the antique cabinet, I wanted to bring in some playful elements to lighten the mood. One thing that came to mind was that I would love a white bicycle to put in the cabinet. When Willie and I were at Hobby Lobby, I went to the clearance section, and almost hidden from view, was that cute little bicycle clock you now see sitting on the cabinet. It was broken and the metal was black. We brought it home to fix it up. I was so tickled that I found a little bicycle. I’ll show you it’s story in an upcoming post with the other paint projects.
You just never know what you can find to elevate. I love finding items that I can salvage and bring back to life, that then bring fun new memories and loveliness to our home.
Till next time, I hope you always follow your joy. God is truly good!
Another fun crafting project at Royalview! I am certainly making up for lost time.
This project really takes me back… Not that I’ve ever made aroma beads, but I was an artistic candle maker and perfumer for nine years, so in the same wheelhouse for sure.
This all began as I’ve been looking for candles, and in particular, candle aromas for Royalview. We’ve tried several brands and scents since we’ve lived here, but nothing has quite fulfilled the aroma(s) that we’re craving. I have been on a specific hunt for Creme Brulee scent. Creme Brulee is our absolute favorite aroma. I worked with Creme Brulee a lot in the past and it is (in my humble opinion) the best smelling, best lasting, and for sure a favorite in terms of a wonderful and lasting scent throw. Our second favorite aroma is Cinnamon, and it has to be a true Cinnamon with a great scent throw as well.
So after searching and trying others’ candles, I decided I may just have to take a whack at it again to get the scents that we’re longing for. I turned to my trusty candle making supplier that I used for years, and hooray, they still carry my favorite Creme Brulee and Cinnamon aromas.
Thank you Lone Star Candle Supply.
The good news about ordering from Lone Star Candle Supply is that you do not have to be a business. I couldn’t remember if I would have to be in the candle making business to order or not, but nope, it is easy to order in a small quantity.
I ordered a small amount of the aroma beads (one pound), and a few one ounce bottles of scent to give this project a try.
Since I have not made aroma beads before, I was very happy that Lone Star Candle Supply has instructions on their site. The only other items that I had to order were a very specific type of plastic bottles, which I found on my favorite shopping site, Amazon. Here’s a link.
I got all my aroma bead making supplies together, and decided to mix these on my kitchen counter, but on an old thick towel, in case of spillage.
This is very simple to do, and without having to melt anything, bravo. I measured the amount of beads I wanted using a measuring cup. They (Lone Star) recommend weighing the beads, but I do not have a scale, so I did what I could with what I have on hand, just to give it a try. The instructions say that one pound of aroma beads can hold two ounces of scent. So, for my project, I went with 8 ounces of aroma beads to one ounce of scent. One ounce of scent in this regard is one, one ounce bottle, so again, very easy with no measuring of the liquid scent. Lone Star Candle Supply also indicates that these aroma beads can be dyed. I decided not to, since I know that both of these particular scents have a tint all their own. The Creme Brulee has a cream tint, and the Red Hot Cinnamon also has a cream tint leaning on the pinker side. I can definitely tell them apart based on their color, and of course their aroma.
I poured 8 ounces of beads into each plastic container, and then in one container I poured a (one ounce) bottle of Creme Brulee scent, and in the other, a (one ounce) bottle of Red Hot Cinnamon Scent. With the Red Hot Cinnamon scent, I know from experience to be very, very careful, and possibly wear gloves for this one. It can burn really bad. That’s why the scent is so good. It is very strong. So if you would ever want to give this a try for yourself, please use caution when pouring this scent, and wash your hands immediately. I would not recommend children handling this scent.
Once everything was in the bottles, I closed the lids tightly and shook each one very good, and for quite a little while. There was still scent puddling at the bottom, but Lone Star Candle Supply’s instructions said that the beads are very absorbent, so I knew it would probably just take a little time for them to absorb everything. I kept them on the towel, and all through the evening I would give them a little shake/toss to be sure all the beads had a chance to absorb the scent.
I did this for a couple of days, until all the scent had been absorbed, and they seemed dry.
When I knew for sure that I was going to try this project, I specifically looked for little decorative holders, so that I could put them out into my decor. I found some really cute and original items at New Waverly Antiques & Collectibles, as well as at Rosey Opals Collective Market.
I shopped around for decorative items that would hold the little aroma beads, and that would be pretty sitting out with our decor.
This trio of vintage style votive candle holders grabbed me immediately. What could be more perfect?
Creme Brulee Aroma Beads
These are from a booth at Rosey Opals Collective Market in New Waverly, TX (not sponsored, we just really love these shops we’re featuring and love supporting local businesses).
I’ve placed these on a shelf on our entertainment center.
And I forgot to mention, they smell AMAZING!! Willie came in while I was pouring the aroma beads into their holders, and said he could really smell them. My hope is that our home is continually filled with these delicious and welcoming scents, and we are greeted with these aromas upon entering our home.
For the three votive candlestick holders, I put Creme Brulee in all three, so that there would be a good amount of Creme Brulee in the living room area.
Here are the other three decorative holders filled with their aroma beads. You can see the color difference in the beads here. The back two are filled with Red Hot Cinnamon, and the little porcelain basket is filled with Creme Brulee.
I love the slight hint of color on the beads. It’s just enough, and has an elegant look.
Red Hot Cinnamon Scented Aroma Beads
And here’s the cute little porcelain cherub, on our entertainment center as well.
Such a fun and rewarding project. I’m really happy with the results. I’ll most likely get more supplies and keep an eye out for more small decorative bowls to place all around our home. Such a beautiful way to have our favorite scents always present, and I’m thinking in the long run, most probably more economical as well. I plan to keep these scents and the bottles on hand to recharge the beads when needed.
Win, win, win!
I hope this post brought a little DIY scent inspiration your way today.
Till next time, stay safe, and follow your joy! God is truly good!
Johanna and Willie
acrossthelake.blog
Making Aroma Beads at Home, Creme Brulee Scent, Red Hot Cinnamon Scent, Easy Scent DIY Project


")